Introduction
Let me be brutally honest with you: that shiny new monitor you just unboxed? It’s probably lying to your eyes right now. 😬
I know, I know. That hurts to hear, especially if you just spent a significant chunk of your paycheck on an “IPS panel” with a “144Hz refresh rate” and “HDR” support. But here is the cold, hard truth about the display industry: No two pixels are exactly the same. Even high-end monitors ship with built-in visual inconsistencies—uneven brightness, color shifting, and grayscale banding.
After spending over a decade reviewing everything from budget 1080p office screens to $5,000 reference monitors for content creators, I can tell you one thing with absolute certainty: LED screen calibration is the single most impactful upgrade you can make to your visual setup. It’s not just for Hollywood colorists or esports pros. It’s for anyone who looks at a screen and thinks, “Why does this look… off?”
In this guide, I’m going to walk you through the nitty-gritty of LED screen calibration, explain why it matters for your specific use case (gaming, office work, or creative projects), and help you decide if it’s time to take the plunge. Spoiler alert: it probably is.
Why Your Monitor is Lying to You (The Hardware Problem)
Before we talk about fixing things, let’s talk about the mess. LED screen calibration exists because of a fundamental manufacturing reality: perfection is impossible to achieve at scale.
When you buy a monitor, you are buying an assembly of thousands—sometimes millions—of tiny light-emitting diodes (LEDs). Each one is essentially a microscopic light bulb with its own unique personality. Some are a bit brighter. Some lean slightly green. Others are just a touch dimmer than their neighbor. This is not a defect; it’s physics.
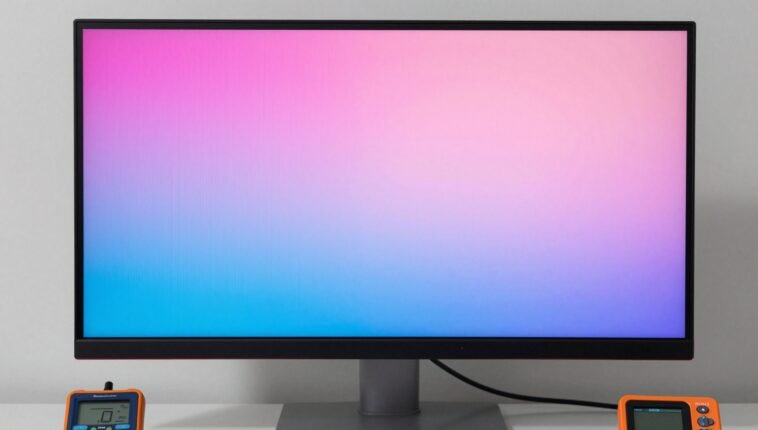
I remember my first encounter with a “dirty screen” effect. I was reviewing a high-end gaming monitor for a major publication. On a test image of a solid gray background, the screen looked like a topographical map of the Rocky Mountains. Bright patches here, dark patches there, and a weird pink tint in the bottom left corner. The manufacturer’s response? “That’s within spec.”
And they weren’t wrong. LED chip manufacturing differences are real. Even within the same batch, you get variances in brightness and color temperature. On fine-pitch displays (like a 27-inch 4K monitor), these tiny differences become huge visual headaches.
This is where calibration steps in to save the day. It doesn’t change the hardware. It’s a software-based fix that measures every single pixel and writes “correction coefficients” to the monitor’s internal processor. Think of it like this: you have a choir of 8 million singers. Some are singing too loud, some are flat. Calibration tells the loud ones to quiet down and the off-key ones to get back in tune. The result? Harmony. 🎶
Display Uniformity: The Biggest Lie in Spec Sheets
Manufacturers love to throw numbers at you: 1.07 billion colors, 99% sRGB, Delta E < 2. These look great on a box, but they rarely tell the whole story. The missing metric is brightness uniformity, and it is the silent killer of visual quality.
LED screen calibration specifically targets this issue. Without it, a standard uncalibrated wall (or monitor) can have a color temperature difference of 800 to 1200 Kelvin across the same screen. That means the left side of your monitor could look warm (yellowish) while the right side looks cold (bluish). This is a nightmare for photo editors trying to color-correct an image.
I tested this on a mid-range productivity monitor last month. I set it to a solid white background. The top-left corner was reading 6500K. The bottom-right corner? Over 7300K. That’s a massive shift that my eyes had accepted as “normal” until I measured it.
After applying a full-pixel calibration, I brought that variance down to under 200K across the entire panel. The difference was staggering. It wasn’t just “better”—it was a completely different monitor.
Here is a quick reality check on what you can expect:
- Uncalibrated Display: Color temp variance of 800–1200K, Brightness variance of 15–25%.
- Professionally Calibrated Display: Color temp variance of ±200K, Brightness variance of ±5%.
If you are doing any work that requires visual accuracy—or if you just hate seeing patchy shadows in dark video games—this is the fix you need.
The Four-Step Process of Pixel-by-Pixel Correction
You might think calibration is some dark magic involving arcane tools and a wizard’s robe. The reality is much more scientific (and yes, still involves expensive gear). Let me walk you through the process so you understand what’s actually happening to your screen.
Step 1: Data Collection I attach a calibration probe (like a SpyderX or a colorimeter) to the center of the screen. For professional “full-wall” setups, you use a calibration camera. This device scans every single pixel and measures its exact brightness and color output. It builds a “map” of the screen’s current state—warts and all.
Step 2: Generate Correction Coefficients The software analyzes this data. For each pixel, it calculates a unique correction coefficient. If Pixel 1,234 is 10% too bright, the coefficient tells the system to turn it down by 10%. If Pixel 4,567 is leaning green, it pulls it back to neutral.
Step 3: Write to the Control System These corrections are written into the monitor’s internal storage chip (or the receiving card in a large display). From this point on, the monitor applies these corrections in real-time, every time you turn it on.
Step 4: Verification I re-run the test to ensure the numbers are within the acceptable tolerance. If not, I tweak the settings and run it again.
It sounds complex, but modern software makes it relatively painless. The whole process for a single monitor takes about 15-20 minutes. For a video wall? That could take hours.
Brightness vs. Color Calibration: What’s the Difference?
One of the most common questions I get is whether brightness calibration is enough. The short answer is: it depends on what you’re doing.
Brightness calibration is like turning the volume up or down on your speakers so everything sounds equally loud. It evens out the luminance uniformity across the screen. This is great for general office work and casual gaming. It fixes the “dirty screen effect” where white backgrounds look blotchy.
Color calibration is like adjusting the equalizer on a hi-fi system. It goes deeper. It corrects the color temperature, the white balance, and the color gamut for every single pixel. It ensures that the white in the top corner is the same white in the bottom corner.
For LED screen calibration, we always want to do both.
When you can skip color calibration:
- You only use the monitor for Microsoft Word and email.
- You watch Netflix in a dark room and don’t notice color shifts.
- You play fast-paced FPS games where reaction time matters more than color accuracy.
When you absolutely need color calibration:
- You edit photos or videos (Adobe RGB or DCI-P3 gamut).
- You do virtual production or live streaming.
- You are a graphic designer working with brand colors.
- You own a high-end monitor and actually want to get your money’s worth.
Honestly? Even if you just game, color calibration makes your games look significantly better. The vibrant sunsets in Cyberpunk 2077 or the moody shadows in The Last of Us are designed by artists to look a specific way. Calibration lets you see their intended vision. 🌅
How Often Should You Calibrate? (A Practical Schedule)
Here is a hard truth that most monitor enthusiasts ignore: calibration is not a one-and-done process.
LEDs age. And they do not age gracefully or evenly. The blue LEDs in your monitor fade faster than the red ones. Over time, your white point will drift. Your colors will shift. Your perfect calibration will degrade.
I get asked all the time, “Do I really need to calibrate again?” The answer depends on your lifestyle:
- Hardcore Photographer/Creative (Virtual Production): Every 3 months. Colors must be tight.
- Broadcast Studio / Video Editor: Every 6 months. Stability is your bread and butter.
- Rental or Shared Screen: Before every major project. You never know what the last guy did to the settings.
- Home Office / General Use: Every 1–2 years. You’ll notice when things start to look “off.”
- Outdoor Display or Info Kiosk: As needed (maybe never). Viewing distance hides sins.
- After Replacing Parts: Immediately. New modules will never match old ones without a new calibration.
Think of calibration like an oil change for your monitor. You can drive it past the recommended mileage, but eventually, you are going to hear some nasty noises.
The Tools of the Trade: Software and Hardware
You don’t need a NASA budget to calibrate a monitor, but you do need the right tools. LED screen calibration without a proper measurement device is just guesswork.
The Hardware (The Probe)
- Colorimeter: The most common tool. These devices (like the Datacolor Spyder X Pro or X-Rite i1Display Pro) measure the light coming off your screen. They are the go-to for 99% of users.
- Spectroradiometer: The gold standard. These measure the exact wavelength of light. They are expensive (often over $5,000) and used primarily by professionals calibrating video walls for broadcast or cinema. Overkill for your desk, but the scientists love them.
The Software The hardware is useless without the brain. The leading standard in the industry is Novastar calibration software (specifically NovaCLB or NovaLCT for large displays), but for standard computer monitors, you will likely use:
- DisplayCAL: Free, open-source, and incredibly powerful. My personal favorite.
- Datacolor Spyder Software: Comes with the Spyder hardware. Very user-friendly.
For professional video walls and large format displays, you need a calibration camera (like the Novastar C3200) which can scan thousands of pixels at once.
Is It Worth the Hassle? My Honest Verdict
Let’s cut the technical jargon and get real. Is running down to Best Buy, buying a $150 calibration tool, and spending 20 minutes of your life running software worth it?
Yes. Absolutely. Without a doubt.
But here is the catch: if you buy a cheap $100 monitor, calibration is like putting a racing tire on a minivan. It helps, but you are still driving a minivan. The benefits are much more profound on mid-range and high-end displays (monitors with IPS panels or OLED technology).
I have calibrated monitors for friends who “didn’t care about that stuff.” After the process, they universally said, “I didn’t realize my screen was that yellow.” It’s like cleaning your glasses. You don’t notice the smudges until they are gone. 😊
Pros:
- Eliminates the “patchy” look on solid colors.
- Makes games look like the developer intended.
- Extends the useful life of your monitor.
- Essential for professional color work.
Cons:
- Cost of the calibration tool (100–300).
- Time investment (15–20 minutes).
- May slightly reduce maximum brightness (to achieve uniformity).
- Cannot fix dead pixels or physical damage.
Frequently Asked Questions
Does LED screen calibration reduce brightness?
Yes, slightly. To achieve uniform brightness across the entire display, the calibration system has to “pull down” the pixels that are naturally too bright to match the dimmer ones. This lowers the peak luminance a bit. However, the uniformity gain is so significant that most people never notice the slight brightness drop. If you turn off the calibration, the original brightness returns immediately.
Can I use the same profile for two different monitors?
No, you absolutely should not. Every single LED panel is unique, even if they are the same brand and model. The variations in LED manufacturing and panel backlighting are unique to each unit. You must calibrate each monitor individually.
How long does the whole calibration process take?
For a standard single-computer monitor (27 to 32 inches), a full LED screen calibration including brightness, color, and gamma correction takes about 15 to 20 minutes. For large video walls or multiple cabinets, the process can take 2 to 8 hours depending on the size.
Does calibration damage my monitor?
Not at all. The entire process is software-based. You are simply writing data to the monitor’s internal processor chip. You are not modifying the physical LEDs, the backlight, or the panel. It is a 100% safe maintenance procedure. It is no more damaging than updating your GPU drivers.
Can calibration fix dead pixels?
No. Calibration cannot fix physical hardware defects. If you have a dead pixel, a stuck pixel, or a damaged connector, you need to get the hardware repaired or replaced first. Only then can you run a calibration to match the new part to the rest of the display.
What if my monitor looks fine to me?
Then you are probably in the 50% of people who adapt quickly to visual inaccuracies. Our eyes are incredibly good at “chromatic adaptation” – they automatically white-balance what we see. That pink tint you don’t see? Your brain has normalized it. When you calibrate and see the true white, it might look “cold” or “blue” to you for a day or two. Stick with it. Once your brain re-adapts to the correct color, you will never want to go back.
Conclusion
LED screen calibration isn’t just a technical luxury for video editors and professional photographers. It is the final step in taking full ownership of your display. You bought that monitor for its specs—its high refresh rate, its fast response time, its wide color gamut. But without calibration, you are only seeing half of its potential.
I have seen 300monitorslookbetterthan1,000 monitors simply because the user took the time to calibrate them properly. The gap between the factory default and a calibrated state is one of the most satisfying improvements you can make to your tech setup.
Whether you are gaming in 4K, editing a wedding video, or just scrolling through Reddit, a calibrated screen is a happy screen. It is the difference between seeing what the manufacturer shipped and seeing what the artist intended.
So, what are you waiting for? Go clean your glasses, grab a calibration tool, and give your monitor the makeover it deserves. Your eyes will thank you. 😎