
Introduction
A monitor that sits too low, takes up half your desk or refuses to move when you need it to can make a workday feel longer than it is. A well-chosen arm can lift your screen, create more room for notebooks and help you position the display more comfortably. But the first thing I’d check is not the colour or the price: it’s whether the mount actually fits your monitor and desk.
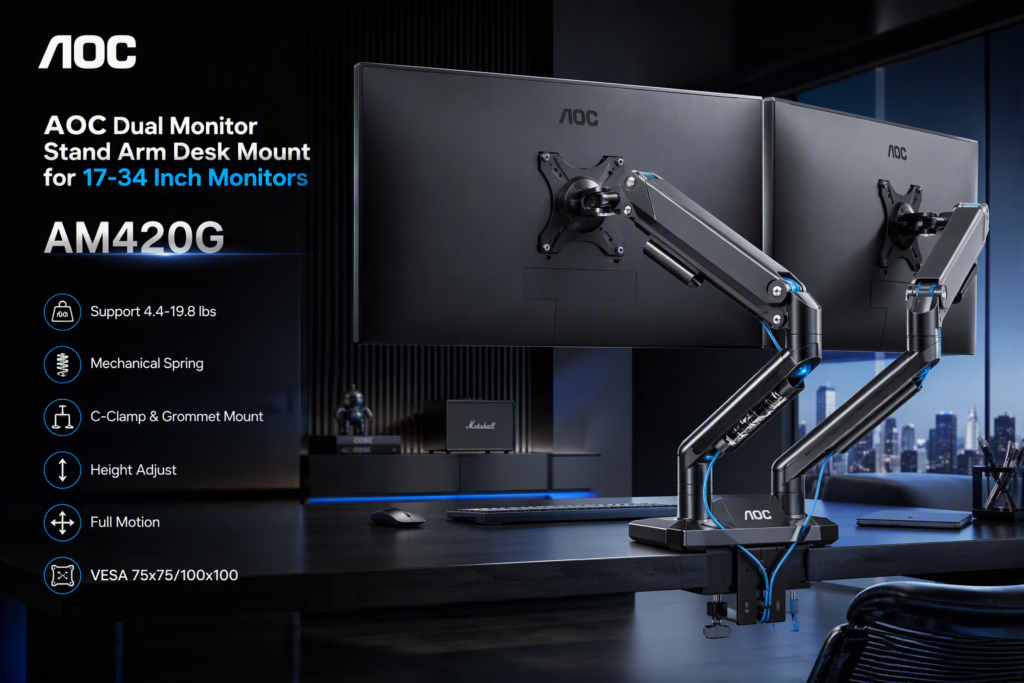
The phrase AOC monitor arm can mean an arm made by AOC, or, more commonly, an arm intended for an AOC monitor. Those are not necessarily the same thing. Many third-party arms work with monitors from several manufacturers, provided the screen’s mounting pattern, weight and dimensions fall within the arm’s stated limits.
In this guide, I’ll explain how to check compatibility, choose a suitable mount and install it sensibly. I’ll also cover the downsides, because a monitor arm is useful, but it is not a magic fix for every desk.
What an AOC monitor arm actually is
AOC is a monitor brand; the arm you’re considering may be made by another company. That distinction matters because you should choose an arm based on your particular monitor’s specifications, not just the logo on its bezel.
Most arms attach to the back of a compatible display using a standard VESA mounting pattern. Common patterns include 75×75 mm and 100×100 mm, but you should confirm the exact size in your monitor’s manual or official product listing. Some displays have a removable stand that reveals four mounting holes. Others may need an adapter, or may not support standard VESA mounting at all.
Think of the arm as two connected fittings: one attaches to the desk and the other to the monitor. The joints let you raise, lower, tilt or swivel the screen, depending on the model. Some use springs to make adjustment easier; simpler models rely on manually adjusted joints.
I’d treat “fits AOC monitors” as a starting point rather than a guarantee. A 27-inch screen and a 34-inch ultrawide may both be made by AOC, but they can have very different weights, mounting needs and dimensions.
Check your AOC monitor before you buy
Before ordering, find your monitor’s full model number. It is usually on a label on the rear casing or in the settings menu. Search for the official specification sheet or manual and check the mounting details there.
| Check | What to look for | Why it matters |
|---|---|---|
| VESA pattern | For example, 75×75 mm or 100×100 mm | The arm’s plate must line up with the monitor’s mounting holes |
| Screen weight | Weight without the original stand | It must fall within the arm’s supported range |
| Screen size | The manufacturer’s recommended size range | Large or wide screens can place extra leverage on the joints |
| Mounting access | Removable stand, recessed holes or adapter requirement | The plate must fit the rear of the display |
| Cable connections | Their location and clearance | The arm or plate should not block ports |
Weight is particularly important. Check whether the arm’s rating applies to each screen, especially if you’re buying a dual-arm model. A monitor can be under the stated maximum yet still feel awkward if it is unusually wide or has a heavy curved panel.
Also check the screws supplied with the arm. If the monitor has recessed mounting holes, the supplied screws may not be the right length. Don’t force a screw or use one that is too long; it could damage the display. If the official manual is unclear, contact the manufacturer before improvising.
Choose an arm that suits your screen and routine
The best monitor arm is the one you can adjust easily and safely—not necessarily the one with the most features. A fixed or basic jointed arm may suit a screen that rarely moves. A gas-spring model is more convenient if you regularly change sitting positions or share the desk.
Consider how you work. If you switch between spreadsheets and video calls, being able to swivel the screen can help. If you use a laptop beside your monitor, a single arm might free space for the laptop stand. If you want to position two screens side by side, look at a dual arm, but check the combined loading and available desk space first.
Useful features to compare include:
- Adjustment range: How far can the screen move up, down, forwards and backwards?
- Tilt and swivel: Can you angle the display without loosening several joints?
- Cable management: Are there clips or channels to keep leads tidy?
- Desk attachment: Does it use a clamp, a grommet fitting, or both?
- Adjustment tension: Can it be tuned to your screen’s weight?
A gas spring is convenient, but it is not automatically better. A cheaper arm may be perfectly adequate for a stationary screen, while an underpowered spring arm can drift or feel difficult to position. Read the weight range carefully and look for clear instructions on adjusting tension.
Check your desk, clamp and available space
A strong arm can still be a poor choice if your desk cannot support it. Check the desk thickness against the clamp’s stated range, and inspect the edge where you plan to attach it. A thin top, a rounded edge, a raised lip or a fragile honeycomb-core surface may not provide a secure clamping point.
A grommet mount uses a hole through the desk rather than gripping its edge. It can be a neat option if your desk already has a suitable cable hole, but measure it first: the fitting needs enough clearance, and you’ll need access underneath to tighten it.
Before buying, consider the screen’s full range of movement. The monitor should not hit a wall, shelf, window or second display when you extend or swivel it. A corner desk or a compact flat in Manchester, Glasgow or London may leave less room behind the screen than a product photo suggests.
To reduce the risk of marking a desk, follow the arm maker’s fitting guidance. A suitable protective pad may help, but it must not make the clamp unstable. If the desktop flexes or the clamp cannot sit flat, choose another mounting position or use the original stand instead.
How to install a monitor arm safely
Every arm is different, so follow its manual rather than treating these steps as a replacement for the instructions. In general, a careful setup looks like this:
- Clear the desk and check that the clamp or grommet parts are present.
- Attach the arm’s desk fitting securely, following the specified clamp range and tightening guidance.
- If you’re removing the original stand, lay the monitor face-down on a clean, soft surface and use the removal method in its manual.
- Fix the VESA plate to the monitor with the correct screws. Tighten them securely, but don’t force them.
- Ask someone to help lift a large or heavy screen onto the arm if the design requires it.
- Adjust the arm tension gradually, then route the cables without pulling them tight.
Once fitted, test the screen’s movement slowly. Check that the clamp remains still, that the monitor does not tilt unexpectedly and that cables do not snag. Don’t use the arm as a handle to move the desk, and avoid leaning on the monitor while adjusting it. If anything feels loose or unstable, stop and check the installation before using the screen.
Set the screen up for comfortable working
A monitor arm makes adjustment easier, but it cannot decide what feels comfortable for you. Start with the screen directly in front of your chair, at a distance that lets you read without leaning forwards. Many people find that the top of the display is around eye level or slightly below, but your ideal position depends on screen size, glasses and posture.
I’d adjust the screen in this order:
- Centre it with your body to avoid repeatedly twisting your neck.
- Raise or lower it so you can look at the display without lifting your chin.
- Set the tilt to minimise glare from windows and lights.
- Move it closer if you find yourself leaning in to read.
- Arrange keyboard and mouse placement separately; a better monitor position doesn’t fix a cramped typing posture.
If you use a laptop as a second screen, avoid placing it so low that you spend all day looking sharply down. A laptop stand or separate display may help. For video calls, leave enough room for the camera to sit near eye level, rather than positioning it at an unflattering angle below your face.
Take a moment to readjust after the first few days. A position that seems fine for ten minutes can feel different after a full afternoon of work.
Pros, cons and alternatives
A monitor arm can improve a desk setup, but it does involve extra cost and a little installation work. It’s worth comparing the benefits against your own needs.
Pros
- Frees up desk space beneath the screen.
- Makes height, tilt and swivel adjustments easier.
- Can help create a tidier workstation with managed cables.
- Lets you reposition the display for different tasks or users.
Cons
- Compatibility depends on VESA fit, weight and mounting access.
- A clamp may not suit every desk edge or desktop material.
- Poorly adjusted arms can sag, drift or feel stiff.
- Installation can be fiddly, especially with a large monitor.
| Option | Best suited to | Main trade-off |
|---|---|---|
| Original monitor stand | Simple, low-cost setup | Often offers limited height or movement |
| Basic monitor arm | Screen that stays in one position | Adjustment may need tools or more effort |
| Gas-spring arm | Frequent, tool-free repositioning | Costs more and needs correct tension |
| Dual monitor arm | Two-screen workspace | Needs more desk strength and careful balancing |
If your screen already sits at a comfortable height and desk space is not an issue, the original stand may be the sensible choice. An arm is an upgrade, not a requirement.
Practical buying tips for real desk setups
For a home-office setup, measure the desktop before looking at product pictures. Leave room for the keyboard, mouse and any laptop you use, then check whether the arm can position the screen without pressing it against a wall. For a shared desk, prioritise easy adjustment and a broad movement range so different people can find a comfortable position.
For gaming, pay attention to screen weight and width as well as the stated maximum size. A large curved monitor may need more clearance behind it and can place more leverage on the arm. Check the manufacturer’s guidance for curved displays and make sure the screen remains stable when you turn or bump the desk.
If you’re mounting two monitors, don’t assume one dual arm will suit any pair. Compare each screen’s weight, VESA pattern and dimensions. Also consider whether the screens need to be aligned at different heights.
My practical rule is simple: make a short checklist before you buy—model number, VESA pattern, screen weight, desk thickness and the space available behind the desk. It takes a few minutes and can save the hassle of returning an incompatible mount.
FAQs
Will any monitor arm fit an AOC monitor?
No. The monitor needs a compatible VESA pattern or an appropriate adapter, and its weight and size must fit within the arm’s limits. Check the exact monitor model rather than relying on the brand alone.
How do I find the VESA size on my AOC monitor?
Look in the monitor’s official manual or specification sheet for the mounting pattern. You can also inspect the rear of the display for four mounting holes, but confirm the measurements before ordering.
Can I mount a curved AOC monitor on an arm?
Often, but not every arm is suitable. Check the monitor’s weight, width and VESA pattern, then confirm that the arm’s manufacturer permits use with a curved screen. A wide display can need more support than a smaller flat one.
Are gas-spring monitor arms worth it?
They can be useful if you regularly reposition the screen, because they usually allow smoother adjustments. If your monitor stays in one place, a simpler arm may provide better value. In either case, the screen’s weight must suit the arm.
Can a monitor arm damage my desk?
It can if the desk is too thin, weak or poorly suited to the clamp. Check the desk material and clamp specifications, tighten the fitting as instructed and stop if the surface starts to flex or crush.
Do I need a VESA adapter for my monitor?
Only if the monitor lacks the mounting pattern required by your chosen arm, and a suitable adapter exists for that specific model. Confirm the adapter is compatible with both the screen and arm before buying it.
Conclusion
A monitor arm can make a desk feel more spacious and give you finer control over screen position. The most important step is checking your exact monitor model: confirm its VESA pattern, weight and mounting access, then make sure the desk and clamp are a safe match.
Whether you choose a simple jointed mount or a gas-spring model, follow the installation instructions and adjust the screen to suit your posture. If the fit or desk strength is uncertain, stick with the original stand until you can confirm compatibility. A few careful checks are worth it for a tidier, more comfortable workspace.