Introduction
Taking a screenshot is a handy feature that lets you capture exactly what’s displayed on your screen. Whether you’re preserving an online receipt, capturing a moment in a game, or saving a social media post, knowing how to screen capture on an ASUS laptop is essential. This guide will walk you through multiple methods to capture your screen, ensuring you can always save the information you need quickly and efficiently.
Table of Contents
| Heading | Sub-Topics |
|---|---|
| Understanding Screen Capture | Definition and Uses |
| Built-In Tools for Screen Capture on ASUS Laptops | Snipping Tool, Snip & Sketch |
| Using Keyboard Shortcuts for Quick Screenshots | PrtScn, Windows + PrtScn, Alt + PrtScn |
| How to Use the Snipping Tool | Types of Snips, Steps to Capture |
| Utilizing Snip & Sketch for Enhanced Editing | Accessing Snip & Sketch, Editing Features |
| Taking Full-Screen Captures | PrtScn Key, Windows + PrtScn |
| Capturing Specific Windows or Areas | Alt + PrtScn, Snipping Tool, Snip & Sketch |
| Saving and Accessing Your Screenshots | Default Save Locations, Changing Save Locations |
| Third-Party Screen Capture Tools | Popular Tools, Benefits of Third-Party Software |
| Editing and Annotating Screenshots | Built-In Tools, Third-Party Software |
| Using Game Bar for Capturing Gameplay | Activating Game Bar, Capturing Screenshots and Clips |
| Capturing Screenshots in Safe Mode | Methods to Capture, Limitations |
| Troubleshooting Screen Capture Issues | Common Problems, Solutions |
| Tips for Efficient Screen Capturing | Keyboard Shortcuts, Workflow Tips |
| Screen Capturing on Different ASUS Models | ASUS ROG, ASUS VivoBook, ASUS ZenBook |
| Security and Privacy Considerations | Safe Sharing, Sensitive Information |
| Frequently Asked Questions | Common Inquiries and Solutions |
| Conclusion | Summary and Final Tips |
| References and External Links | Additional Resources |
Understanding Screen Capture
Screen capture, or screenshotting, is the process of taking a snapshot of whatever is displayed on your screen at a particular moment. This function is invaluable for saving visual information quickly, documenting error messages, or creating tutorials.
Definition and Uses
A screenshot is a digital image of what is visible on a monitor, television, or other visual output devices. Screenshots are commonly used to demonstrate a computer program, document an error message, show a game score, or share a piece of a webpage. They can also be used in professional settings for documentation and reporting purposes.
Built-In Tools for Screen Capture on ASUS Laptops
ASUS laptops come with several built-in tools that make capturing your screen easy. These include the Snipping Tool and Snip & Sketch, both of which offer versatile options for taking and editing screenshots.
Snipping Tool
The Snipping Tool is a long-standing Windows utility that allows you to capture screenshots in various forms.
Snip & Sketch
Snip & Sketch is a more recent addition to Windows 10, providing a modern interface and additional features for capturing and editing screenshots.
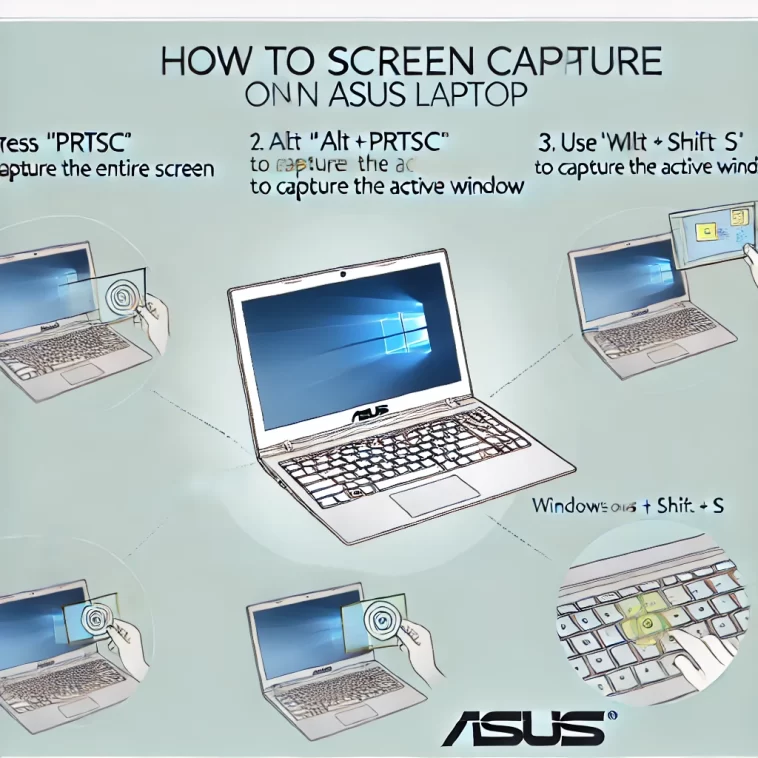
Using Keyboard Shortcuts for Quick Screenshots
Keyboard shortcuts provide the fastest way to capture your screen. Here are some essential combinations:
PrtScn (Print Screen)
Pressing the PrtScn key captures the entire screen and copies it to the clipboard. You can then paste the screenshot into an image editor or document.
Windows + PrtScn
This combination captures the entire screen and saves the screenshot directly to the Screenshots folder in the Pictures library.
Alt + PrtScn
Pressing Alt + PrtScn captures only the active window and copies it to the clipboard.
How to Use the Snipping Tool
The Snipping Tool is a built-in Windows utility that allows you to capture custom screenshots.
Types of Snips
- Free-form Snip: Draw any shape around the area you want to capture.
- Rectangular Snip: Drag the cursor to form a rectangle around the area.
- Window Snip: Select a window to capture.
- Full-screen Snip: Capture the entire screen.
Steps to Capture
- Open the Snipping Tool.
- Click on the ‘New’ button.
- Choose the type of snip you want.
- Capture the desired area.
Utilizing Snip & Sketch for Enhanced Editing
Snip & Sketch offers more advanced features compared to the Snipping Tool.
Accessing Snip & Sketch
You can open Snip & Sketch from the Start menu or by pressing Windows + Shift + S.
Editing Features
After capturing a snip, you can annotate, highlight, and crop your screenshot within the app. Snip & Sketch also offers a delay feature, allowing you to set a timer before the screenshot is taken, which is useful for capturing context menus or tooltips.
Taking Full-Screen Captures
Capturing your entire screen can be done easily with the PrtScn key or the Windows + PrtScn combination.
PrtScn Key
The PrtScn key captures the whole screen and copies it to the clipboard. From there, you can paste it into any application that supports image pasting, such as Microsoft Paint or Word.
Windows + PrtScn
When you press Windows + PrtScn, the entire screen is captured and saved automatically to the Screenshots folder. This is a quick and efficient way to save screenshots without needing to paste them manually.
Capturing Specific Windows or Areas
For capturing specific windows or areas of your screen, Alt + PrtScn, Snipping Tool, and Snip & Sketch are ideal tools.
Alt + PrtScn
This shortcut captures only the currently active window, making it perfect for when you need to focus on a specific application.
Snipping Tool and Snip & Sketch
Both tools allow for custom area selection. You can capture a rectangular area, a specific window, or even draw a free-form shape around the area you want to capture.
Saving and Accessing Your Screenshots
By default, screenshots are saved in the Screenshots folder within your Pictures library. You can change this location through the settings of the Snip & Sketch tool or your screenshot utility of choice.
Default Save Locations
Screenshots taken with Windows + PrtScn are saved in the Screenshots folder. You can access this folder by navigating to the Pictures library on your computer.
Changing Save Locations
To change where your screenshots are saved, you can adjust the settings in Snip & Sketch or use third-party tools that offer custom save locations.
Third-Party Screen Capture Tools
Several third-party tools offer advanced screen capturing features, such as Greenshot, Lightshot, and Snagit. These tools often provide enhanced editing, annotation, and sharing options.
Popular Tools
- Greenshot: A free, open-source tool that offers quick screenshot capture, easy annotation, and direct uploading to image hosting sites.
- Lightshot: A simple and fast screenshot tool with powerful editing options and the ability to share screenshots online instantly.
- Snagit: A premium tool by TechSmith that provides a comprehensive set of features for capturing, editing, and sharing screenshots and video recordings.
Benefits of Third-Party Software
Third-party tools often come with additional features not found in built-in utilities, such as advanced editing capabilities, better annotation tools, and seamless sharing options. They can also offer more flexibility in terms of capture methods and save locations.
Editing and Annotating Screenshots
Editing and annotating screenshots can be done using built-in tools like Paint and Photos, or third-party applications that offer more sophisticated options.
Built-In Tools
- Paint: Basic editing features like cropping, resizing, and drawing.
- Photos: Simple editing features, including cropping, filters, and basic adjustments.
Third-Party Software
- Greenshot: Includes a built-in editor with annotation tools.
- Lightshot: Allows you to add text, arrows, and shapes.
- Snagit: Provides a robust set of editing and annotation tools, including the ability to create step-by-step tutorials.
Using Game Bar for Capturing Gameplay
The Game Bar is a useful tool for gamers, enabling them to capture screenshots and record clips while playing.
Activating Game Bar
Press Windows + G to open the Game Bar. You can then capture screenshots or record gameplay.
Capturing Screenshots and Clips
The Game Bar allows you to take screenshots or record video clips of your gameplay. These are saved in the Captures folder in the Videos library by default.
Capturing Screenshots in Safe Mode
Taking screenshots in Safe Mode can be tricky but can be done using the Snipping Tool or PrtScn key. Be aware that some features may be limited in this mode.
Methods to Capture
- Snipping Tool: Available in Safe Mode and allows for various capture methods.
- PrtScn Key: Works in Safe Mode, but you may need to paste the screenshot manually into an application like Paint.
Limitations
Some graphical features and tools might be disabled in Safe Mode, limiting the functionality of certain screen capture methods.
Troubleshooting Screen Capture Issues
Common issues include the PrtScn key not working or screenshots not saving. Solutions include checking your keyboard settings and ensuring there is enough storage space.
Common Problems
- PrtScn Key Not Working: Check if the key is mapped correctly and not being used by another program.
- Screenshots Not Saving: Ensure you have sufficient storage space and check the default save location settings.
Solutions
- Keyboard Settings: Verify that the PrtScn key is enabled and not reassigned.
- Storage Space: Free up space on your hard drive if screenshots are not saving.
Tips for Efficient Screen Capturing
Utilize keyboard shortcuts for quick access, organize your screenshots in dedicated folders, and use annotation tools to highlight important details.
Keyboard Shortcuts
Familiarize yourself with the various keyboard shortcuts for screen capturing to increase efficiency.
Organize Screenshots
Create a dedicated folder structure for your screenshots to keep them organized and easily accessible.
Use Annotation Tools
Use built-in or third-party annotation tools to add notes, arrows, and highlights to your screenshots, making them more informative and easier to understand.
Screen Capturing on Different ASUS Models
Different ASUS models like ROG, VivoBook, and ZenBook may have unique features or software for screen capturing, so refer to your user manual for model-specific instructions.
ASUS ROG
Designed for gamers, ASUS ROG laptops may come with additional gaming capture tools like the ROG GameVisual or GameFirst utilities.
ASUS VivoBook
The VivoBook series is geared towards everyday users, with standard Windows screen capturing tools readily available.
ASUS ZenBook
ZenBooks often include additional ASUS software like MyASUS, which can enhance screen capturing with additional features and integrations.
Security and Privacy Considerations
Always ensure you’re capturing and sharing screenshots safely, especially if they contain sensitive information. Use encryption and secure sharing methods where necessary.
Safe Sharing
Avoid sharing sensitive information in screenshots unless absolutely necessary. Use secure methods to transfer files if needed.
Sensitive Information
Be cautious about the information visible in your screenshots, especially if you plan to share them publicly. Blur or redact any personal or sensitive details before sharing.
Frequently Asked Questions
How do I capture a screenshot on my ASUS laptop? You can use the PrtScn key, Snipping Tool, or Snip & Sketch for taking screenshots on an ASUS laptop.
Where are my screenshots saved? By default, screenshots are saved in the Screenshots folder within the Pictures library.
What do I do if my PrtScn key is not working? Check your keyboard settings, ensure the key is not disabled, and try alternative methods like Snip & Sketch.
Can I capture screenshots in Safe Mode? Yes, but some features might be limited. Use the Snipping Tool or PrtScn key for capturing screenshots in Safe Mode.
Are there any third-party tools for screen capturing? Yes, popular third-party tools include Greenshot, Lightshot, and Snagit.
How can I edit my screenshots? You can use built-in tools like Paint and Photos or third-party applications for more advanced editing.
Conclusion
Screen capturing on an ASUS laptop is a straightforward process thanks to the variety of built-in tools and keyboard shortcuts available. Whether you need to capture a full screen, a specific window, or just a portion of your screen, there are multiple methods to fit your needs. By understanding these tools and techniques, you can ensure that you never miss a critical screenshot.